How do I set references before starting a planting session?
The Planting Assistant guides the operator to reach target planting positions, which are displayed to the operator during execution. This enables the generation of target maps based on detailed planning, ensuring the minimum expected quality.
First, you will learn what references are.
What are references?
References are predefined coordinates or markers with the desired position for the seedlings to be planted. They are crucial for ensuring planting accuracy and consistency, especially when working with large or segmented plots. This article explains how to define and use reference points within the Planting Assistant system.
Next, you will learn how to set up references. Please, note that there are two ways to set references for the Planting Assistant:
-
By importing a map that includes the reference points: This is the recommended method. If you wish to import a map, you can go directly to this article.
-
By using the Reference Builder to create the references directly on the display: This method is quick and doesn’t require importing any files. If you wish to set references manually and autogenerate a map, proceed to the next section on how to set references.
How do I set references?
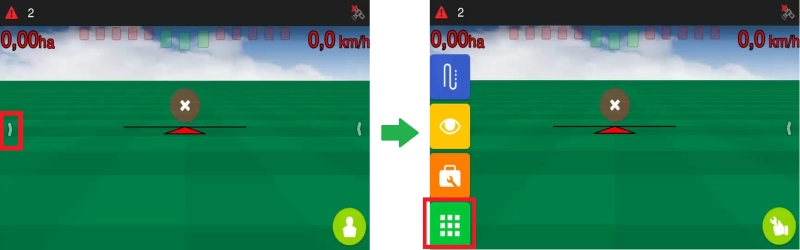
1. Open the menu on the operations screen by clicking the arrow on the left-hand side, then selecting the menu button as shown below:
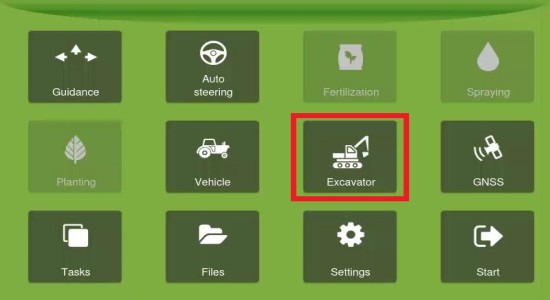
2. In the main menu, select Excavator.
3. In the Excavator planting screen, first set the Position tolerance by clicking on it and typing a value.
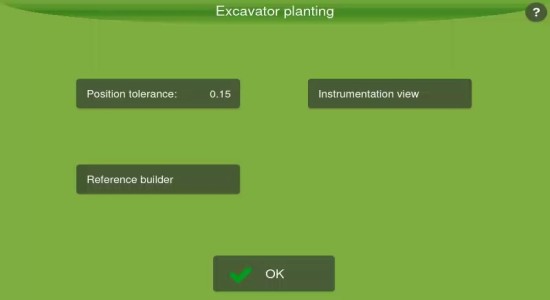
Position tolerance refers to how closely the actual placement of plants matches a predefined location or pattern. It defines the acceptable deviation from the target position, measured in meters.
4. Next, click Reference builder to set references for your map. You will be taken to the Planting reference builder page.
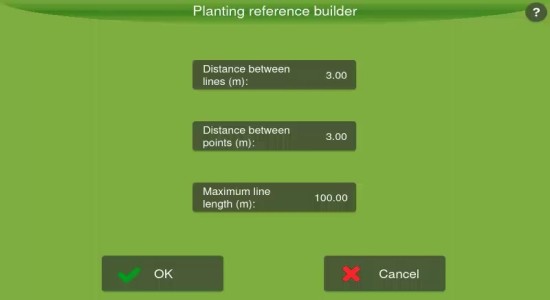
On this page, you can define how the Planting Assistant generates and organizes reference lines and points across the field. Configure the following parameters:
-
Distance between lines (m): Sets the spacing between each parallel reference line. This will be the distance between the lines of trees.
-
Distance between points (m): Defines the interval between individual reference points along each line. This is going to be the distance between the trees in a line.
-
Maximum line length (m): Limits how long each reference line can be. This helps break large fields into manageable segments and can improve performance and accuracy in hilly or complex terrain.
5. Once you have filled out all the fields, press OK. After adjusting these parameters, the system will generate a grid of reference lines and points based on your settings. These references will guide planting operations, with consistent spacing and alignment across the entire field.
6. Finally, access the operation screen to trigger the reference map generation. Click here to learn how to autogenerate a map.